
As an Amazon Associate I earn from qualifying purchases
I posted my linen closet progression on social media this weekend and got a lot of questions and comments. So I thought I would share here for everyone.
I have to say I LOVE my linen closet now. I told my friend when I sent her the finished photo, I want to live in my hall closets now. If you are new here, a few months ago I did my front foyer closet, you can read about it here. So now let’s get to the linen closet makeover.
Linen Closet: Edit and Organize
First things first, get rid of stuff!! I pulled everything out of my closet and went through each basket, a pile. I kept everything we use regularly and got rid of items we no longer use.
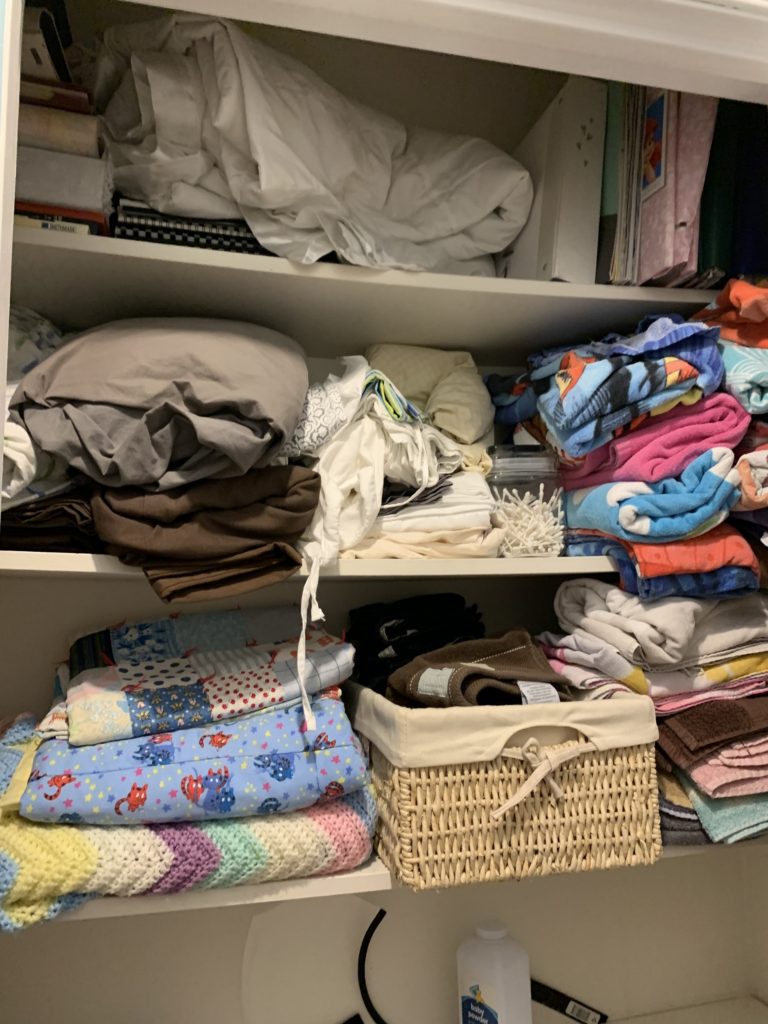
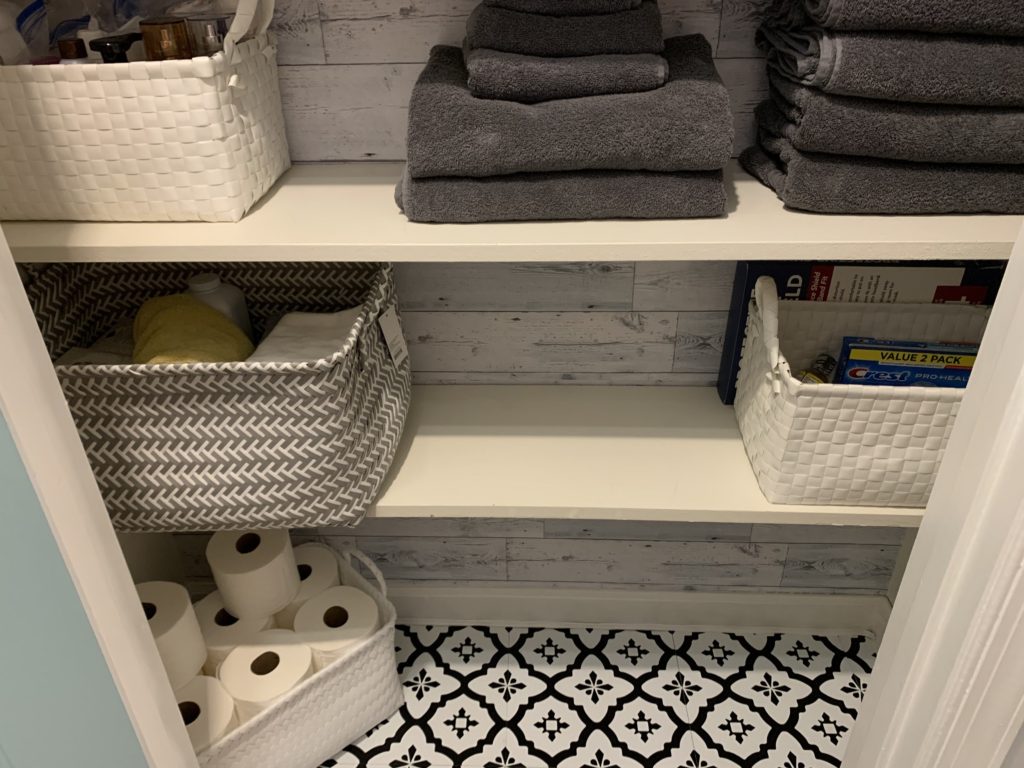
Next I organized. A lot of my stuff was already organized into baskets, but I reorganized because you know, family members like to just throw stuff in the closet. I already had the white weave baskets for years. I think I bought them from World Market. I needed some new ones and I wanted a universal look. So I went to the internet and found some just like them, only bigger (bonus!) at Target! Snatched those up!!
This is also a great time to relocate items that don’t need to be there. I had scrapbooks on the top shelf and gift bags and wrapping paper on the floor. I relocated those items to the bonus room since they really didn’t need to be in our hallway linen closet.

Linen Closet: Removing Carpet + painting
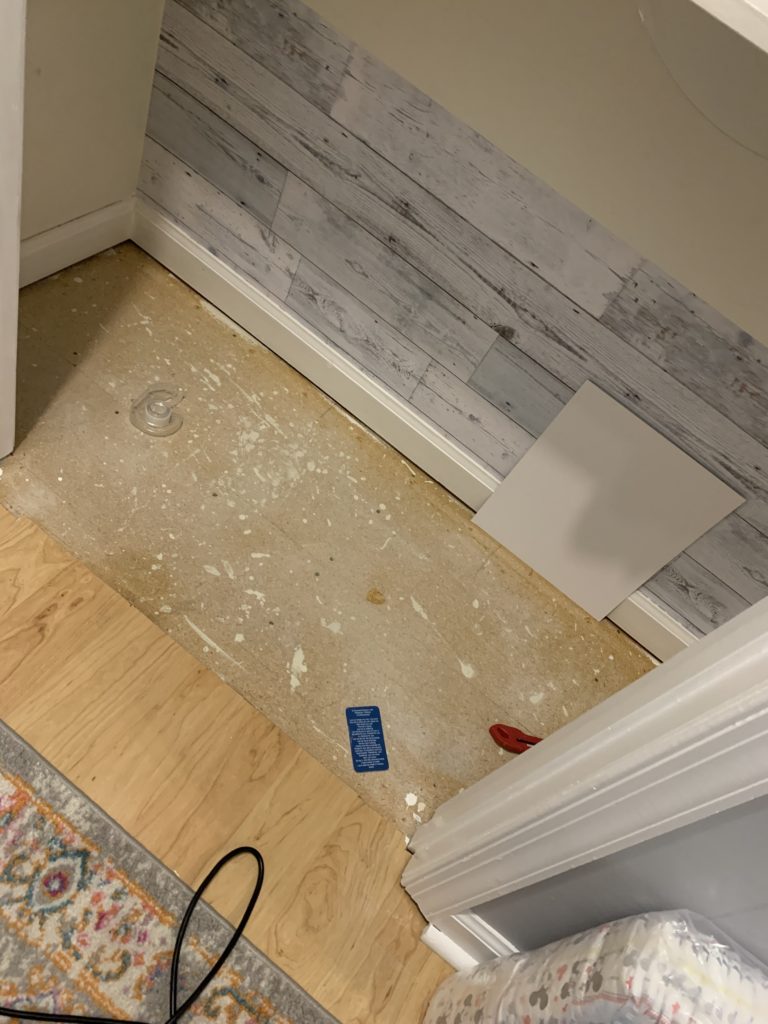
Now is the time for the face lift!! Carpet be gone! My kids love doing this task! My youngest daughter pulled the carpet and under foam out. It was such a relief. I have wanted to do this for over 10 years but life gets in the way! I pulled up all the tack strips and staples in the floor. I vacuumed up the mess, wiped clean the sub floor and then let it sit for 24 hours.
I did a super quick coat of paint on the baseboards. I had some white paint laying around so I used it (I believe it was left over from the white I used on my foyer bookcase makeover, you can find here). I let the paint dry (not really, I’m impatient when it comes to projects).
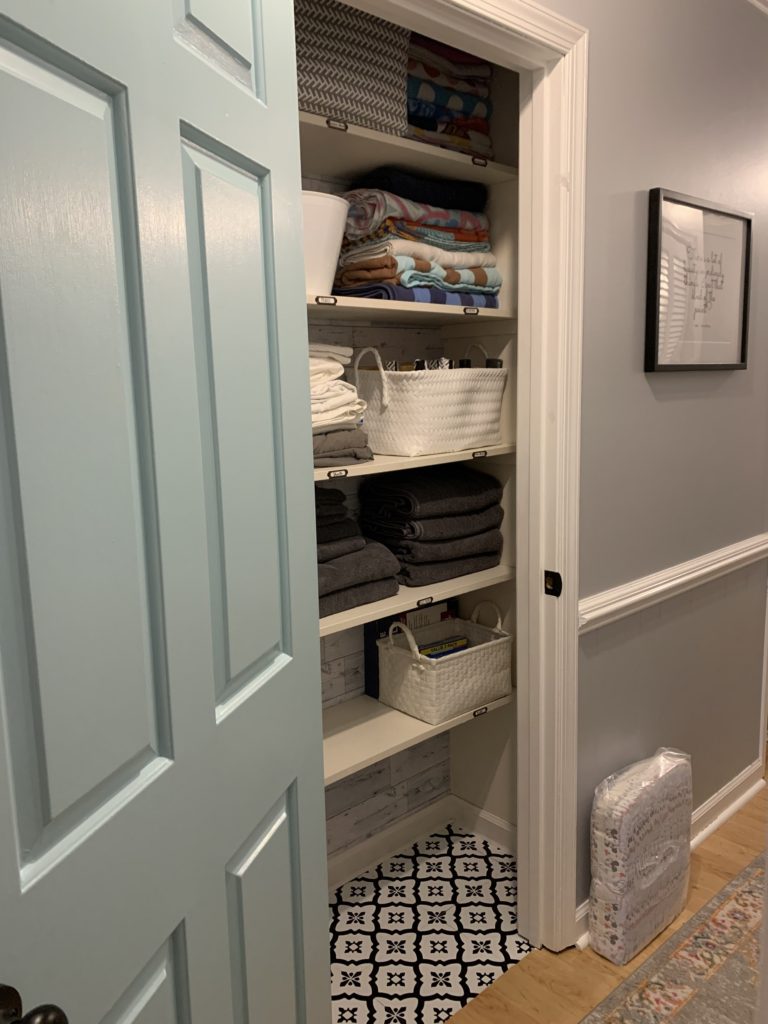
Linen Closet: Add some fun with wall paper
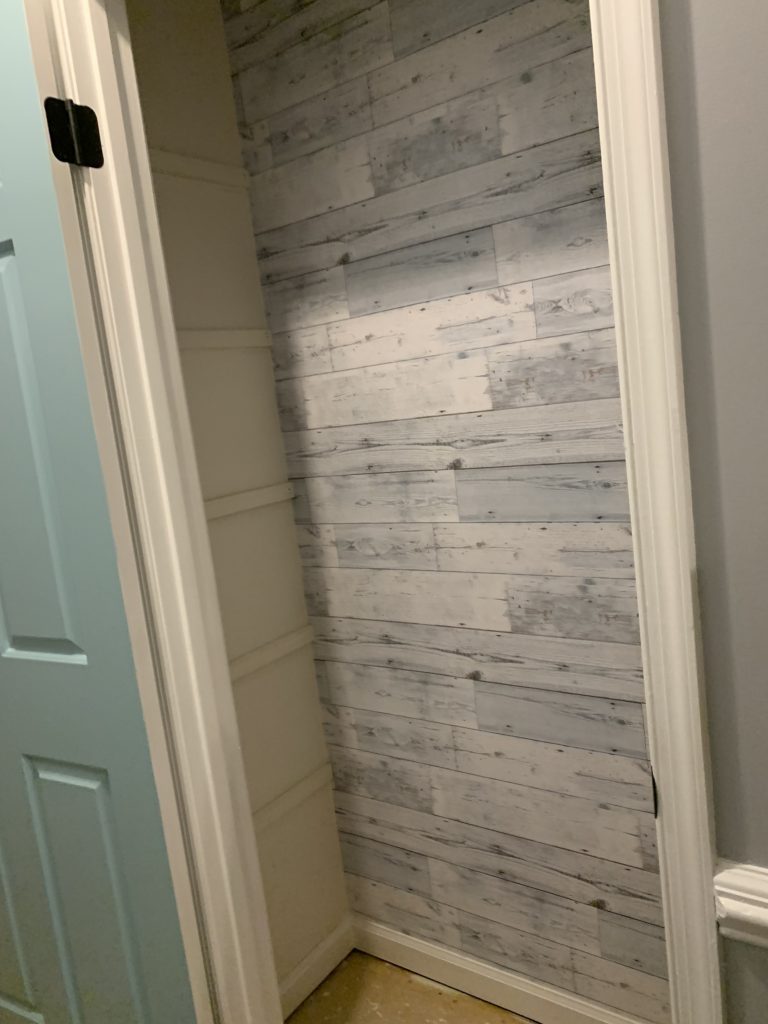
And now the fun part … the wall paper! Yep that drift wood is wall paper! Peel and Stick wall paper!! I grabbed it off Amazon, here. It is my new found love! They have so many designs and options to choose from! I have used peel and stick wall paper on several projects in the house in the past couple of months. It’s super easy to put up, and when you don’t like it anymore, super easy to take off (unlike those awful old wall papers from years ago).
This took me a while to do since I am a perfectionist, but it went on super easy and made such a difference. I choose this particular pattern because it complimented the blue door and went with the tile I would be using. I do suggest you wipe down the wall with warm water and mild soap so you have a clean canvas to begin with.
Linen Closet: Peel and Stick Tile
Now to everyone’s favorite … the floor! I used these same tiles in the front foyer closet. And while I know most people will not see the insides of my closet, I do and I want them pretty and uniform. So I went with the same tiles. I bought them off Amazon, here, but you can also get them at Lowe’s I believe.
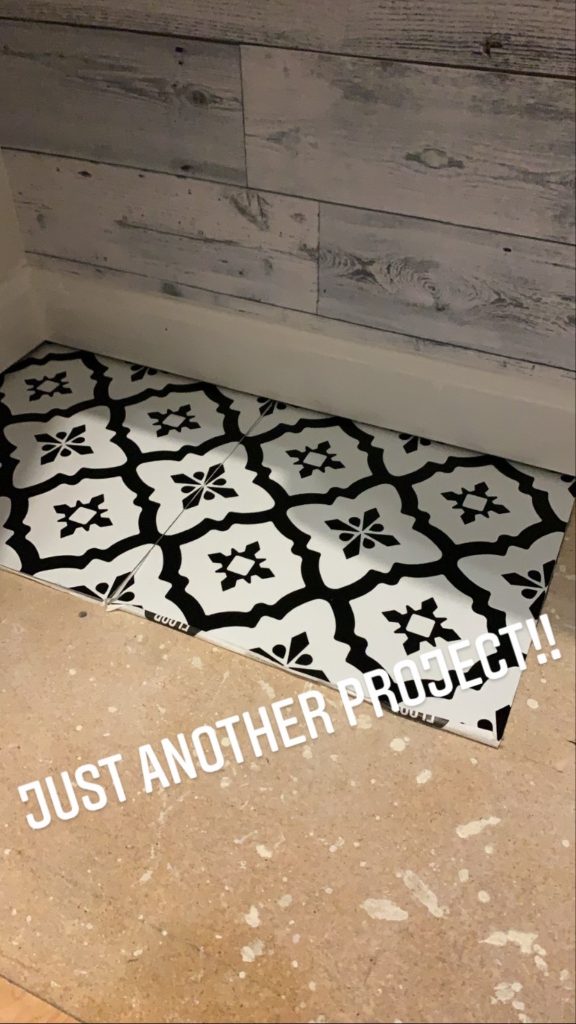
I did the floor the second day because I wiped down the sub floor and wanted to make sure it was fully dry before I placed the tiles on them. Doing peel and stick tile in a small closet is a bit easier and much different then if I was going to do them in a large room (which I am really considering for some of our bedrooms!!). Instead of finding the center and moving outward, I start in the corner and go across. I measure and cut where needed and it takes me about an hour to get this size of space done. I do place my tiles under my baseboard, I know some people do not. It is just easier that way and I know they are secure.
To finish the look I use another peel and stick product, Insta trim found here, as a finish and to close the gap between the baseboard and the tile floor. It’s a small space and not seen daily so using quarter round just wasn’t’ something I needed to do.
Linen Closet: Finishing touches + putting it all together
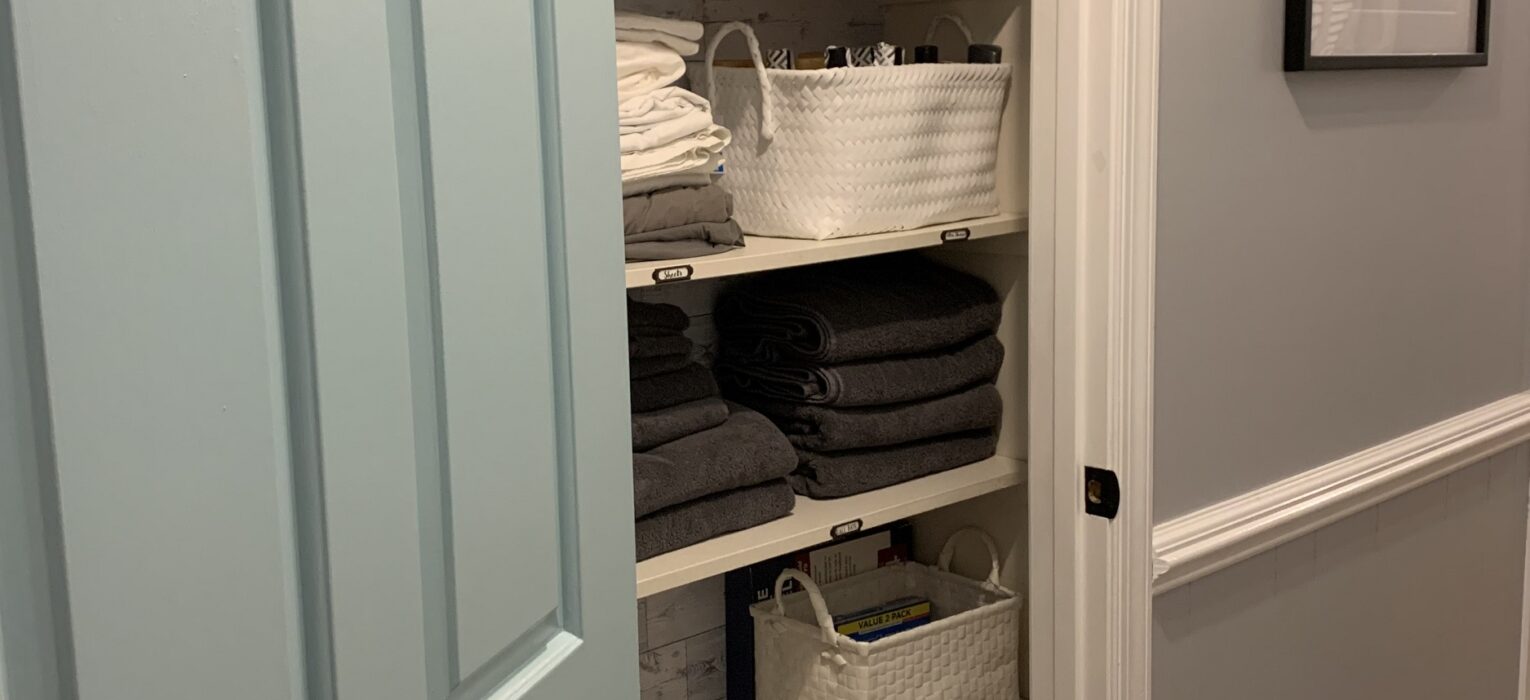
Next I put everything back in on the shelves where I needed to place them. Items we use daily or most often were on the shelves right in front and then items we use less often on the top and bottom shelves.
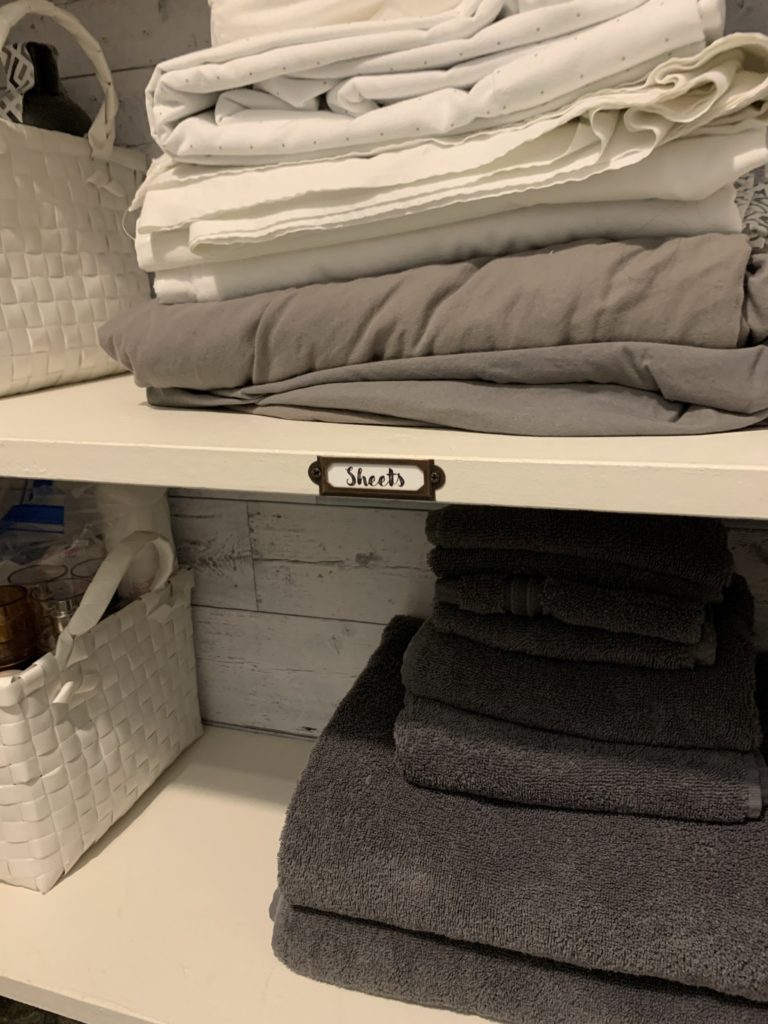
Next the finishing touches, labels!! This isn’t necessary but I loved the look of them and this way no one in my house can say they don’t know where something goes!! A little bit more work on my end now {hopefully} equals a lot less work and stress on my part in the future. I bought these metal tags for a super awesome price and plan to use them in other areas of the house! I printed off using a simple word document and then cut them out to fit inside.
I am in love with the finished product! I shared a video on my social media story and got so many comments and questions. I hope this post inspires you to makeover a space in your home. Share with me in the comments.
Happy Monday friends!!


